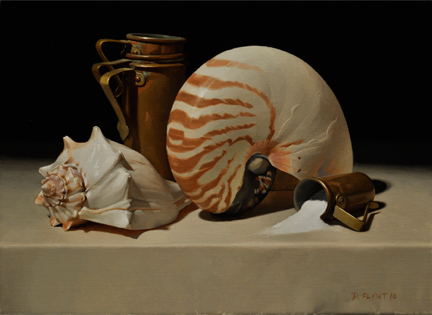
Back in March I hosted a two week "Still Life Painting Workshop" out of my studio. The following images are from the demonstration piece I worked on throughout the workshop. It was not fully finished by the end of the workshop and so I completed it afterwards. I estimate that it took about 58 hours in total time from beginning to end. Yes all that time for a small 9" x 12" painting.
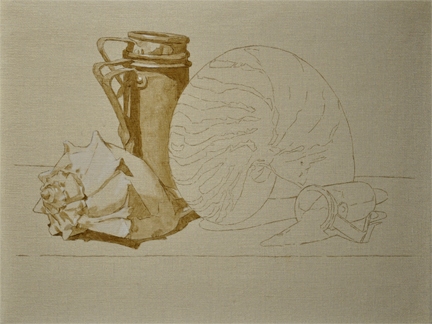

The completed wash in. I also used white to lighten some areas slightly.
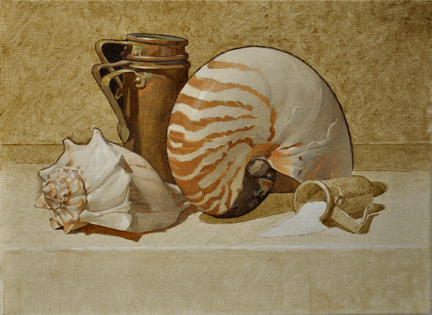
This image shows the start of my ébauche or first block-in with color. This is still an under-painting and will all be repainted. As with the wash in it is still keyed slightly lighter than what the final values will be. It can be thought of as a rough draft—the content has been stated but still needs proof reading.
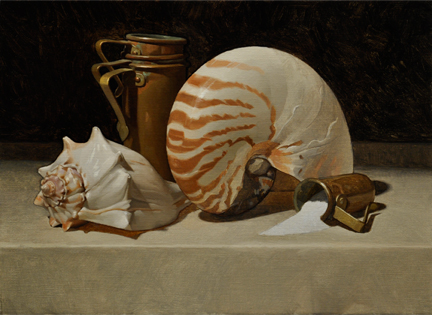
In this image some of the painting has received a final pass (the proof reading). I carefully rendered each object, form by form, finishing as I went.
And of course the final painting. Thanks for taking a look!
Abosolutely outstanding! I appreciate you sharing your process with us. Would love to have seen it in person. Maybe one day I will be able to attend a session!
ReplyDeleteMorning Doug,
ReplyDeleteLet me be among the first to remark on your new piece. As usual your work sets the bar to a high standard for all of us, your students in particular, to aspire to. A beautifully finished work.
Onward and upward ~ Charley Morgan
It is beautifully executed. I love it's simplicity. I am truly inspired.
ReplyDeleteCheers
Great demonstration Douglas, cheers!
ReplyDeleteBeautiful painting Doug. I can now start to imagine the focus and commitment each painting must take. Your methods certainly yield fantastic results!
ReplyDeleteThank you everyone for your comments!
ReplyDeleteit is great to see how much time you put into the drawing before you start to paint. i have recently added this way preparation to my work. i was taught to draw with the brush but always found myself fixing shapes over and over again. i like now breaking up the stages as you have show. i had one question, when you are making your finishing pass over things are you repainting the whole section? or are you darkening and lightening little things around the whole?
ReplyDeleteHi Brian,
ReplyDeleteWhen I am working on the finishing pass I am completely repainting the whole section. For me this seems to work best. Thanks for the comment.
Doug, I looking again at this post and I must say that is a beautiful painting and a beautiful process. Every step has is own beauty.
ReplyDeleteMay I ask you a question about the progression?
Between the wash in in raw umber, that seems very diluted, and the color ebauche, you change the transparency of the painting? In other words, should be right to say that the color ebauche is more opaque than the wash in, but more transparent than the final pass?
Well, thanks again for share this kind of work and process!
Best!